
Test a NOx Sensor With a Multimeter: Heater and Signal Circuits
How We Tested and Verified
Verified through hands-on procedure on Cummins ISX15 CM2350, Detroit DD15 EPA17, and OEM service manuals. Safety steps confirmed with shop SOP and EPA stationary regen guidelines.
This content is for informational purposes only. Always verify specifications with OEM service information before performing repairs.
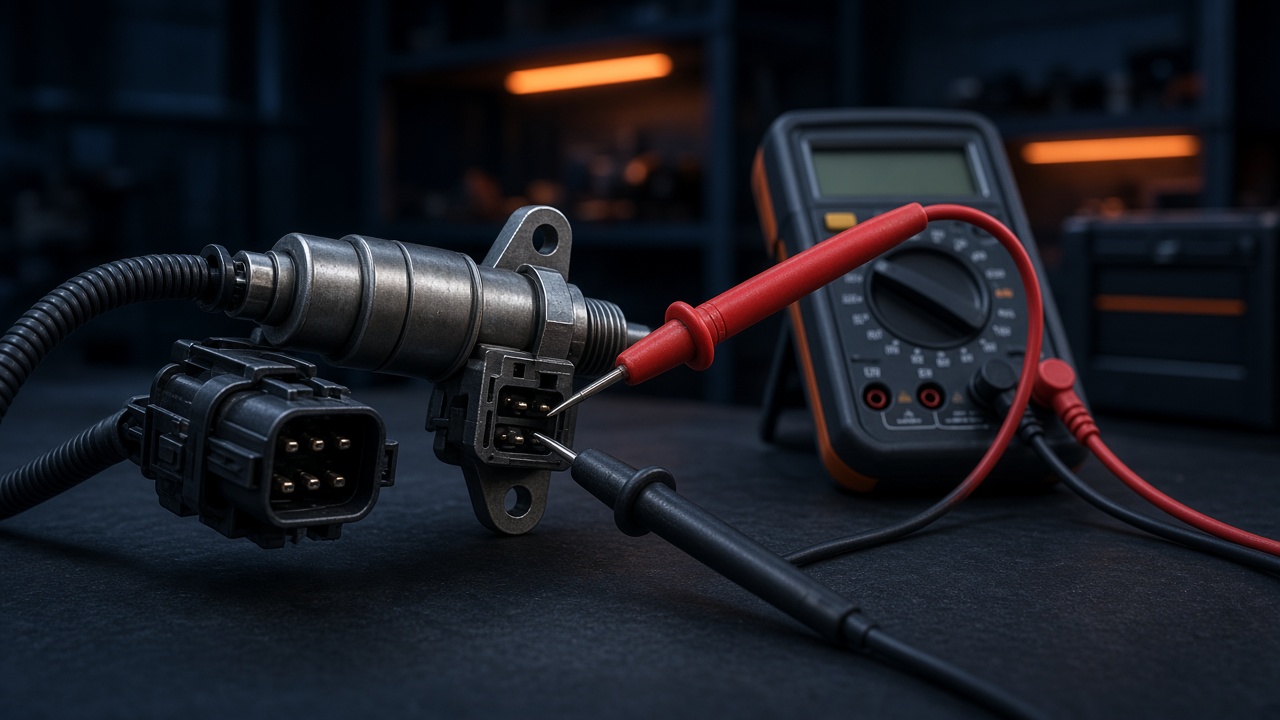
Test a diesel NOx sensor with a multimeter by checking three circuits: heater supply voltage (12.4–14.2V key-on), heater current draw (4–8 amps during 60–120 second warm-up), and signal circuit resistance (kilohm range at room temp per OEM pinout — open or 0 ohms means replace). On Cummins 5WK96681/682 and Detroit A010153 series sensors, a good heater with failed signal cell still throws SPN 3216 — bench test before spending $400–$750 on a sensor you may not need. Test cold first; heat expands chafed harness cracks into opens that disappear when the engine bay cools.
NOx Sensor Connector Pinout Basics
Typical 5-pin: heater positive, heater negative, signal, reference, shield. Pin assignment varies — pull wiring diagram by engine serial.
Disconnect sensor, key off for resistance tests. Key on engine off for supply voltage — do not back-probe powered connector with metal probe slip.
Heater Supply Voltage Test
Key on, engine off: heater supply pin to ground should read battery voltage 12.4–14.2V within 5 seconds of key cycle.
Zero volts: check fuse (often shared with DEF heater), relay, ECM driver. Repair harness before sensor.
Heater Current Draw Test
Series ammeter on heater circuit or clamp meter on heater wire during key-on heat-up.
Expected: 4–8 amps for 60–120 seconds until sensor ready PID true in INSITE.
0 amps: open heater element — replace sensor. 15+ amps: short — harness or sensor short to ground.
Signal Circuit Resistance
Sensor disconnected, measure signal to reference per OEM — typically kilohm range at room temp, not open, not 0.
Open circuit: failed sensing element. Short: wiring fault.
Live Signal With Scan Tool
Compare multimeter sanity to INSITE NOx ppm PID. Stuck 0 or 3,000 ppm with good heater — cell failed.
Slow response to throttle change — contaminated tip, replace after fixing leak source.
Harness and Connector Inspection
Wiggle test at frame clip while monitoring heater amps — dropout confirms harness.
Corrosion in connector: clean with electrical contact cleaner, dielectric grease, reseat.
When Multimeter Says Replace Sensor
Open heater, implausible resistance, good supply and ground confirmed at connector.
Order by part number on sensor body — not interchange listings.
Post-Repair Verification
Clear codes, idle heat-up 2 min, highway 30 min, confirm SPN 4364 monitor completes.
Safety Notes
Exhaust-hot sensor burns — cool below 150°F. Wear gloves. Do not apply 12V bench power to sensor outside OEM procedure — fire risk.
Connector Pin Corrosion Repair Procedure
Use Deutsch connector repair kit — replace terminal not just clean when corrosion green. Heat-shrink boot over repair.
Apply dielectric grease — not conductive grease — on seal side only.
Verify pin retention force — loose pin causes intermittent FMI 20 under vibration.
Cummins ISX15 Pinout Reference
On CM2350/CM2450, upstream NOx sensor (Sensor 1) uses 5-pin Deutsch DT. Pin 1: heater positive (switched 12V from ECM). Pin 2: heater negative (ground through exhaust manifold). Pin 3: signal output. Pin 4: reference ground. Pin 5: shield drain. Always pull wiring diagram by engine serial — 2017 EPA13 builds differ from 2020 EPA17 pin assignments.
Detroit DD15 upstream A0101533228 uses similar layout but grounds through dedicated harness splice at frame rail position 4. Voltage drop on ground above 0.3V during heater operation causes intermittent FMI 20.
Heater Current Profile Table
Connect clamp meter to heater positive wire. Key on, engine off. Expected Cummins 5WK96681 profile: 0–10 seconds at 6–8 amps (rapid heat-up), 10–60 seconds at 4–7 amps (maintaining temperature), 60–120 seconds at 2–4 amps (approaching ready state), 120+ seconds at 1–3 amps (steady state). Zero amps with good supply voltage confirms open heater element.
Signal Resistance Specifications
At 68°F ambient, Cummins specifies 2,500–4,500 ohms between signal and reference pins on healthy sensor. At 32°F, resistance rises 15–20%. Open circuit at any temperature means failed electrochemical cell. Zero ohms means short — check harness before condemning sensor. Disconnect both sensor and ECM ends before measuring.
Voltage Drop Ground Test
Set multimeter to millivolt scale. Key on, heater active. Measure heater negative pin to battery negative. Acceptable: under 200 mV. Reading 400–800 mV indicates corroded ground path through exhaust flange — sand manifold stud, apply dielectric grease, retorque to 25 ft-lbs.
Intermittent Harness Diagnosis
Chafed harness at frame clip (Kenworth T680 passenger side common on ISX) opens circuit when hot, closes when cold. Heat gun on suspect section while monitoring heater amps pinpoints break. Repair with Deutsch connector kit 114017 — replace minimum 6-inch section, not tape wrap.
Wiggle test at ECM connector C3 (CM2350) while monitoring fault status. Intermittent FMI 20 with good bench readings confirms harness, not sensor. Check for green corrosion on pins — replace terminal, not just clean.
Bench vs In-Vehicle Testing Decision
In-vehicle testing handles 90% of diagnoses without sensor removal. Remove only for visual tip inspection (coolant deposits, DEF crystallization) or when connector is inaccessible. After replacement, torque sensor to 45 Nm ± 5 (Cummins spec). Route harness away from exhaust with OEM clips.
Platform Comparison: Cummins vs Detroit vs Paccar
Cummins INSITE shows NOx Sensor 1/2 with ready flag and ppm live data. Detroit DiagnosticLink shows sensor status with 750°C target temperature (vs Cummins 650°C). Paccar MX with Cummins aftertreatment follows Cummins logic. Volvo/Mack use Premium Tech Tool with different connector but same heater current expectations.
OEM Bulletin Cross-Reference
Search QSOL or Detroit portal by engine serial before ordering parts. Mid-year supersession changes strand wrong components on the shelf. Save bulletin PDF to work order for warranty audit.
Check for related campaigns — some fleets qualify for prorated coverage under 200,000 miles with documented API DEF use and authorized dealer service history.
Platform-Specific Diagnostic Differences
Cummins INSITE provides percentage-based soot load and explicit regen controls. Detroit DiagnosticLink uses gram-based soot mass. Paccar MX mirrors Cummins on shared aftertreatment. Always use OEM software — generic OBD reads codes but cannot reset inducement or force regen.
Pressure and Temperature Reference Values
Monitor at operating temperature (coolant above 160°F). Idle differential pressure under 10 in H2O on healthy DPF. Cruise (65 mph flat) 4–8 in H2O normal, above 15 in H2O suggests restriction. SCR inlet temperature above 400°F required for efficiency monitor.
Warranty and Documentation Requirements
Attach scan tool PDF showing before/after fault status, relevant PIDs, and inducement reset confirmation. List installed parts with manufacturer part numbers. Driver sign-off on repair explanation reduces repeat roadside calls.
Escalation Criteria
Escalate to OEM technical hotline after two failed repair attempts with complete data log. Cummins Care and Detroit Customer Support provide case numbers for warranty escalation. Independent shops without platform expertise should refer ECM flash and security gateway procedures to dealer.
Scan Tool Parameter Reference
Key PIDs to log during diagnosis: soot load, ash load, differential pressure, exhaust temperature at DPF inlet and outlet, DEF level and quality, NOx upstream and downstream, SCR inlet temperature, and inducement status. Save freeze frame data before clearing codes — warranty auditors request parameter snapshots.
Data log format: CSV export from INSITE or DiagnosticLink with timestamp, engine speed, load, and aftertreatment parameters at 1-second intervals during road test. Minimum 30-minute highway log for SCR monitor completion analysis.
Common Comeback Prevention
Second-tech verification before return to service: all clamps torqued, heat shields installed, wiring routed from exhaust, fluid levels checked, no active or pending codes, inducement not active. Photo documentation of repair area reduces dispute on 300-mile comebacks.
Customer communication: explain root cause, what was replaced, and operational changes required (DEF quality, regen completion, idle reduction). Written acknowledgment on work order closes the loop.
Fleet Telematics Integration
Configure telematics alerts for target SPNs at first occurrence — not after derate. Monthly SPN frequency report in fleet meeting shared between operations and maintenance. Units exceeding fleet average fault rate 2x get targeted inspection before next route.
Cummins INSITE Diagnostic Shortcuts
Fault Code Status screen sorts by inducement level — always address highest severity first. Aftertreatment menu groups DPF, SCR, and DEF parameters in one view. Use ‘Snapshot’ function before clearing codes to save freeze frame. Parameter search by number (4114 for soot load) faster than browsing menus.
INSITE data monitor records up to 8 parameters simultaneously during road test. Standard aftertreatment monitor set: 4114 soot, 4110 diff pressure, 3216 NOx upstream, 3217 NOx downstream, 1761 DEF level, 4334 DEF quality, 4364 SCR efficiency, 1569 inducement status.
Detroit DiagnosticLink Diagnostic Shortcuts
Aftertreatment Health Report generates PDF summary for fleet records. Static regen requires same safety preconditions as Cummins — outdoor, stationary, coolant temp met. DD15 soot displayed in grams not percentage — 70g triggers regen request, 120g critical.
DiagnosticLink ‘Recommended Actions’ panel suggests repair steps based on active fault combination. Useful for junior techs but verify against OEM service procedure — recommendations do not account for recent repairs or modified components.
Wiring Harness Inspection Points
Common chafe locations: frame rail at suspension pivot, exhaust manifold bracket, transmission crossmember, and behind cab air bag mount. Inspect harness every 100,000 miles or at any aftertreatment fault with good component test. Repair with heat-rated wire (TXL 16 gauge), adhesive heat shrink, and Deutsch connector.
Connector inspection: look for green corrosion, pushed-back pins, broken latch tabs, and moisture in boot. Clean with electrical contact cleaner, apply dielectric grease on seal side only. Replace terminal if corrosion is green — cleaning is temporary fix.
Parts Ordering and Supersession
Always order by engine serial number through QSOL or Detroit portal — mid-year supersession changes part numbers without notice. Verify core return requirements before ordering turbos, injectors, and ECMs. Core charges $500–$2,000, return window 30 days.
Counterfeit aftertreatment components circulate on marketplace sites — NOx sensors and DEF dosers fail within 30 days. Buy from authorized distributor when inducement and warranty exposure exists. Keep invoice with part number for CARB audit.
Detroit DD15 NOx Sensor Test Variations
Detroit downstream sensor mounts lower on SCR outlet — more DEF vapor exposure. Test procedure identical but cool-down takes 45 minutes versus 30 on Cummins. DiagnosticLink PID ‘NOx Sensor 2 Status’ must read ‘Ready’ within 180 seconds. If heater current good but status not ready, cell failure confirmed.
Detroit harness revision kit A0001532559 addresses chafe at frame standoff on 2018–2020 DD15 builds. Install kit before third sensor replacement — recurring 3216 with good bench readings is harness, not sensor quality.
Paccar MX and Volvo NOx Sensor Notes
Paccar MX-13 with Cummins aftertreatment uses identical 5WK96681/682 sensors and test procedure. Paccar EST shows sensor data under Aftertreatment menu. Volvo/Mack with DPF+SCR use different connector (4-pin on some MP8) but heater current expectations remain 4–8 amps.
NOx Sensor Replacement Torque and Installation
Apply copper anti-seize to threads only — never on sensing tip. Cummins torque: 45 Nm ± 5. Detroit: 35–45 Nm. Route harness with OEM clips away from exhaust. After install: key on 3 minutes heat-up, highway 30 minutes, verify NOx ppm responds to throttle. Clear codes only after verification drive confirms rational readings.
Order sensor by part number stamped on body — Cummins 5WK96681A/B upstream, 5WK96682 downstream. Detroit A0101533228 upstream, A0101534828 downstream. Cross-reference listings cause immediate FMI 20 on install due to wrong calibration curve.
Verification Drive Protocol After Repair
Idle 3 minutes for sensor heat-up. Highway drive minimum 30 minutes above 55 mph on flat road. Monitor scan tool for parameter changes during drive. Re-scan at destination: zero active faults, inducement not active, relevant monitors completed or pending with customer advised to continue highway driving. Save scan tool PDF to work order.
If monitor pending after 30-minute drive, continue 20 more minutes or schedule return visit. Some SCR and DPF monitors require specific speed/load conditions not achievable on all routes.
Frequently Asked Questions
Can I test NOx sensor without removing it?
Yes for electrical — connector tests in place. Contamination requires removal for visual tip inspection.
What amp draw is normal?
4–8A during heat-up, drops when at temperature — exact profile in Cummins bulletin.
Will bad ground cause SPN 3216?
Yes — heater ground through exhaust manifold can corrode. Voltage drop test ground circuit.
Can I swap upstream and downstream to test?
Diagnostic swap only — reinstall correct positions and clear codes after.
Multimeter vs oscilloscope?
Oscilloscope overkill for heater — scan tool PIDs sufficient for signal plausibility.
Related tools: Use our repair cost estimator for quick estimates and planning.
Related reading: spn 3216 fmi 20 nox sensor failure, spn 4364 fmi 18 scr efficiency low, comply carb regulations.
Sources
- Cummins QSOL — NOx sensor test procedures
- Detroit DiagnosticLink aftertreatment diagnostics
- SAE J1939-71 — NOx sensor parameters